A working wireless mic setup comes down to three components: transmitter, receiver, and a clean audio route to your mixer or PA. Power on the receiver first, run auto-scan or IR sync to pair with the transmitter, connect via XLR to your mixer, and set conservative gain levels. You’ll know it’s working when the RF and audio meters sit stable and the mixer channel delivers clean sound with no clipping.
TL;DR:
- Always power on the receiver before the transmitter to ensure a proper frequency match during auto-scan or IR sync.
- Use balanced XLR cables for runs over 25 feet to minimize noise, and keep batteries charged to prevent mid-event dropout.
- Place antennas high and angled in a V shape, at least 10 feet away from Wi-Fi or mobile signals, to prevent dropouts and interference.
- Run pre-event range tests at all performer locations, log frequencies, and brief volunteers on mic handoff procedures to ensure smooth operation.
- Prioritize process, battery management, and proper calibration over expensive gear upgrades, as human error and setup flaws cause most mic failures.
Table of Contents
- What you need: components and cables
- How do you set up a wireless mic step by step?
- Frequency bands and interference: what beginners get wrong
- Why antenna placement decides your line of sight
- Your pre-event testing checklist
- Fixing common wireless mic problems fast
- What DJ Phoenix does differently on-site
- Where to go for deeper reading
- What the research actually tells you about reliability
- Sources
What you need: components and cables
Every wireless mic setup starts with the same core pieces, whether you’re miking a wedding officiant or a keynote speaker. The transmitter sends the signal, and it comes in two flavours: handheld units built into the microphone body, or bodypack and plug-on transmitters that pair with lavalier, headset, or handheld capsules depending on the performer’s movement and wardrobe.
The receiver catches that signal and converts it back to usable audio. You’ll find rack-mount receivers for permanent installs and portable units for mobile gigs, most using diversity antennas (two antennas instead of one) to fight signal dropout.
Cabling matters more than most beginners assume:
- Balanced XLR for any run over 25 feet, since it rejects hum and noise far better than unbalanced options.
- TRS or TS cables work fine for short consumer setups but degrade over distance.
- Fresh batteries or charged packs for every transmitter, since battery failure is the single most common cause of mid-event dropout.
A standard wireless microphone setup requires a transmitter, a receiver, a microphone, and cables, and skipping any one of those pieces is where most beginner rigs fall apart before the first song plays.
How do you set up a wireless mic step by step?
Once your gear is on the table, the sequence matters as much as the gear itself. Follow these steps in order:
- Mount the receiver somewhere high and unobstructed, away from metal AV racks or speaker cabinets that block RF signal.
- Attach the antennas and angle diversity antennas into a V shape rather than parallel; this reduces multi-path fade on stage-facing receivers.
- Power on the receiver first, then the transmitter. This order matters because the receiver needs to be actively scanning before the transmitter starts broadcasting, which is how most systems complete a clean frequency match.
- Run auto-scan on the receiver, or select a frequency manually if you’re coordinating multiple channels.
- Sync via infrared by holding the transmitter 4 to 6 inches from the receiver’s IR window until it confirms the match.
- Connect the receiver’s output to your mixer, using XLR whenever the mixer supports it, and assign the input to an open channel with gain turned down low.
- Set gain in stages: keep the transmitter and receiver at conservative levels, have the performer speak at their loudest realistic volume, then raise the mixer’s channel gain until the meter reads between −12 dB and −6 dB.
Pro Tip: Always do your IR sync with the transmitter powered on and the mic capsule pointed away from your face. Some plug-on transmitters pick up breath noise during sync if you’re too close to the mic head.
That gain range isn’t arbitrary. It gives you enough headroom to absorb an excited toast or a sudden laugh without clipping, while still keeping the noise floor low enough for quiet vows or soft-spoken remarks.
Frequency bands and interference: what beginners get wrong
Most interference problems trace back to band confusion, not bad luck. UHF systems offer the widest tuning range and the best resistance to crowded RF environments, which is why professional productions lean on them. VHF is cheaper but far more prone to interference from other electronics. 2.4 GHz systems, popular with solo creators and mobile shoots, trade channel density for portability and simplicity.
A few practical rules keep things stable:
- Run auto-scan on every receiver before an event, even if it worked fine last week; the RF environment shifts constantly.
- Assign systems to different groups and channels rather than guessing at frequencies when running more than two mics.
- Space channels apart deliberately if you’re stacking several wireless systems in one room.
- Step up to a spectrum analyzer or professional frequency coordination once you’re running six or more channels, because active coordination and continuous RF monitoring separate amateur setups from professional productions.
Digital systems with wide tuning ranges hold up far better in crowded venues than older analog gear, which is worth remembering the next time you’re booking a corporate ballroom packed with other exhibitors’ RF equipment.
Why antenna placement decides your line of sight
Dropouts are rarely random. They’re almost always caused by something physical blocking the signal path between transmitter and receiver: a row of guests, a metal equipment rack, or a hotel’s built-in AV cabinet standing between the performer and your receiver.
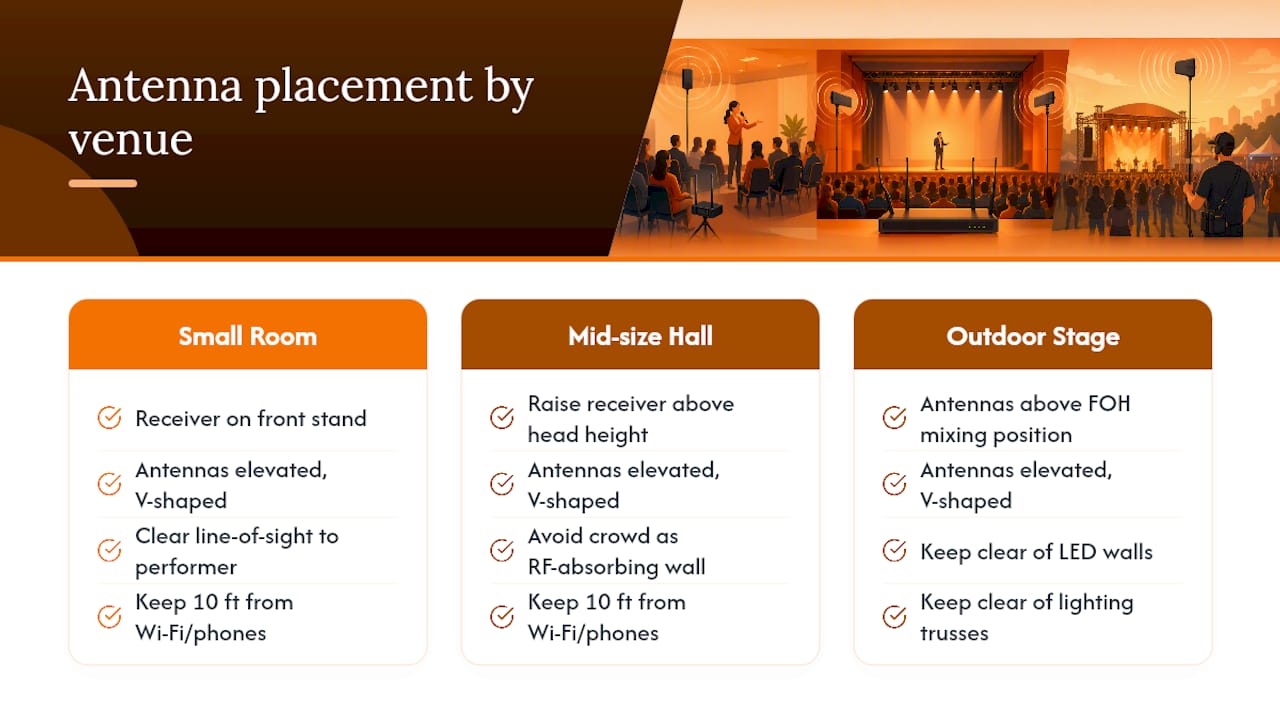
Keep antennas elevated, angled in that V shape, and at least 10 feet away from strong Wi-Fi routers or dense mobile phone clusters to avoid competing signals. In a small room, a receiver on a stand near the front usually has clear sight lines to every position the performer will occupy. In a mid-size hall, you may need to raise the receiver above head height so the crowd doesn’t become a moving wall of RF-absorbing bodies. For an outdoor stage, keep antennas above the FOH mixing position and clear of any LED walls or lighting trusses, since both can generate their own interference.
Your pre-event testing checklist
Do this walk-through before a single guest arrives:
- Range test: carry the transmitter to every spot the performer will stand, including backstage or a bridal suite, and watch the receiver’s signal meter for dead zones.
- Pack spares: extra batteries, a backup wired or wireless mic, labelled cable runs, and adapters for whatever connector surprises the venue.
- Log your frequencies: write down every channel and group assignment so a second operator can troubleshoot without guessing.
- Brief your volunteers: give anyone helping with mic changes a two-line script: “check the light, check the level, hand it off clean.”
This kind of walk-through is exactly what separates a smooth ceremony from a scramble, and DJ Phoenix’s own ceremony sound checklist builds on the same logic for wedding vows specifically.
Fixing common wireless mic problems fast
When something breaks mid-event, work through causes in this order:
- Dropouts: check the battery first, then move the transmitter or receiver to restore line of sight, and try an alternate frequency if the RF environment has shifted.
- Hiss or static: revisit your gain staging; a receiver output pushed too hot forces the mixer gain down and buries the signal in noise. Balanced XLR cables also solve a surprising amount of static that people blame on the mic itself.
- Feedback: move speakers further from open mics, cut gain on the offending channel, and apply a notch filter at the ringing frequency; mute any mic that isn’t actively in use.
- Pairing failures: confirm both units are on a compatible band, then fall back to manual frequency selection if auto-scan won’t lock in.
What DJ Phoenix does differently on-site
Years of running sound for weddings, corporate galas, and multicultural celebrations teach you that gear rarely fails on its own. It fails because nobody planned the handoff. DJ Phoenix treats every mic transfer, whether between a mother of the bride and an officiant or between two corporate speakers, as a scripted moment: mute before the swap, confirm level after, never hand off a live mic.
A labelled spare kit sits within arm’s reach at every event, and one channel stays reserved as a hot backup. If a wireless unit drops mid-ceremony, a trained team member can switch to the wired spare within seconds rather than fumbling through a bag. Staffing one dedicated person to run mic checks 15 minutes before every multi-speaker segment, whether it’s toasts or a corporate awards program, catches problems while there’s still time to fix them quietly.
Where to go for deeper reading
For quick fixes, the Sweetwater wireless microphone setup guide covers pairing and gain basics well. For long-term frequency planning at scale, Shure’s guide to wireless system coordination and DPA’s comprehensive wireless system guide go deeper on multi-channel events. Gear changing hands? We Buy Microphones Miami offers a straightforward path for selling or replacing units.
What the research actually tells you about reliability
The conventional advice on wireless mic setup obsesses over gear tiers. Buy the pricier digital system, the thinking goes, and your interference problems disappear. That’s only half true. A $150 2.4 GHz unit with 32-bit float recording as a safety net will outperform a poorly gain-staged professional rig every time, because the failures event organizers actually experience trace back to process, not equipment tier.
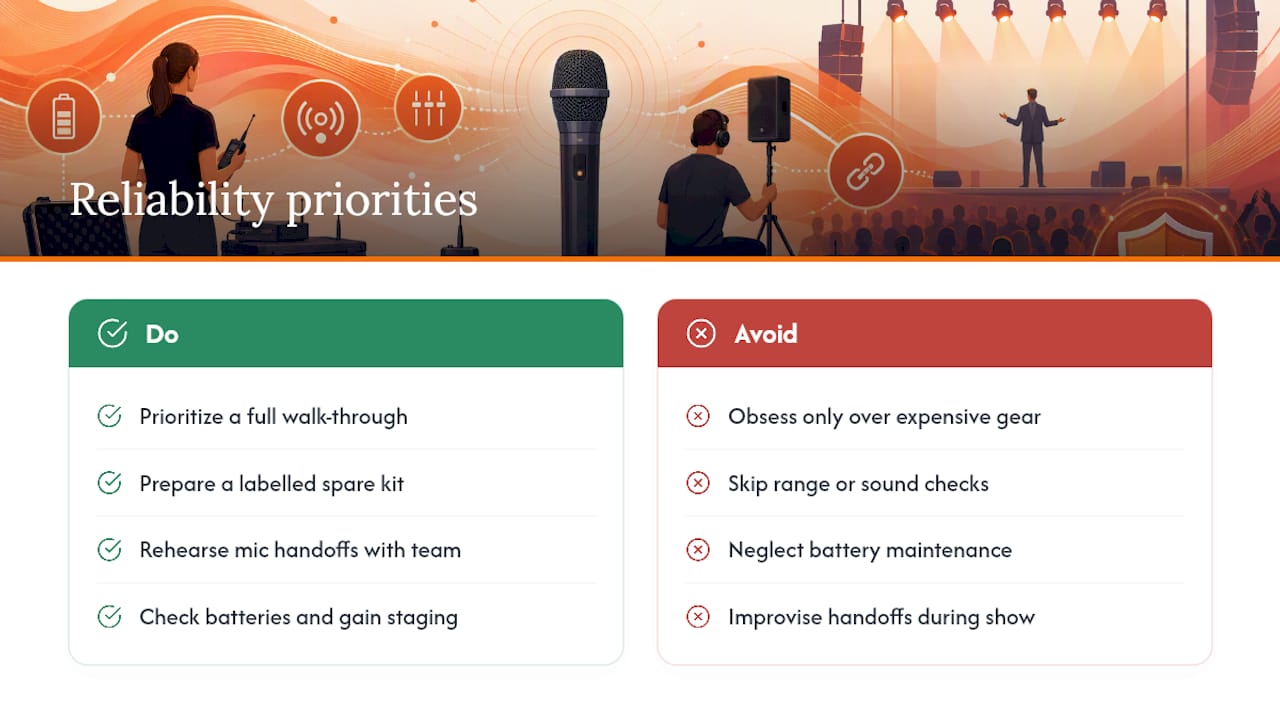
Battery neglect, skipped range tests, and improvised mic handoffs cause more mid-event silence than any interference issue a spectrum analyzer would catch. A rehearsed handoff protocol and a labelled spare kit do more for reliability than upgrading a single transmitter ever will.
If you’re setting up for your first event, prioritize the walk-through and the spare kit before you obsess over antenna diversity or UHF versus 2.4 GHz debates. Get the boring fundamentals locked down first. The RF theory matters eventually, but it’s rarely what saves your ceremony when something goes wrong at 2 p.m. on a Saturday.
— Reza
Wireless mic setup doesn’t need to feel like a gamble once guests start arriving. If you’d rather hand the entire audio puzzle to someone experienced in running sound for weddings, corporate stages, and multicultural celebrations, you can choose a professional DJ service that builds reliability into every event booked. Browse the DJ performance gallery to see the sound setups in action, or reach out directly through Dj-phoenix to talk through your event’s specific mic and sound needs.
Sources
- Wireless Microphone Setup Guide – Sweetwater
- All about wireless system planning, coordination and monitoring – Shure
- Your first wireless system: comprehensive guide – DPA Microphones
- Review: RØDE Wireless PRO 32-bit float recorder – Newsshooter