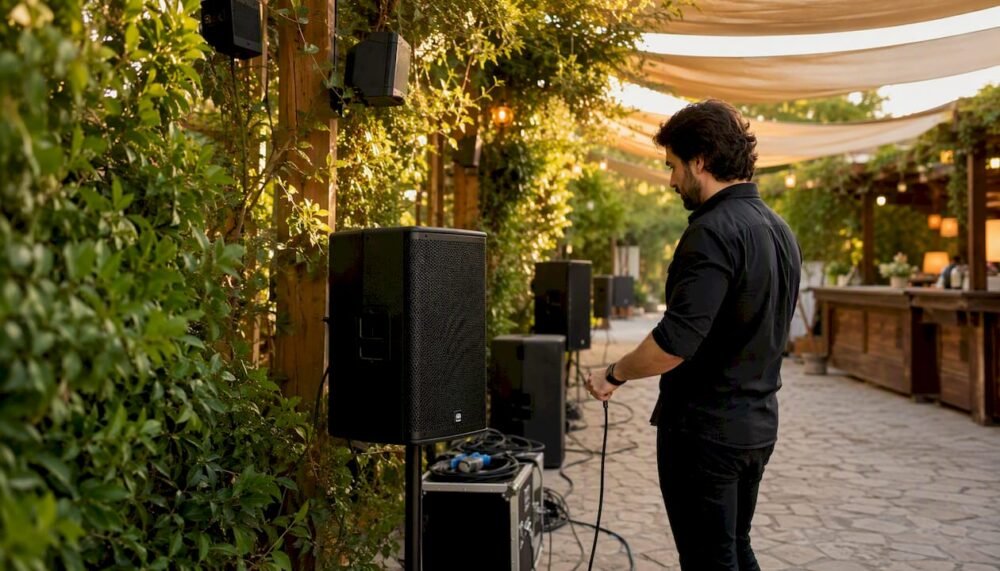
A destination venue can absolutely deliver exceptional sound for your wedding — provided you run the right checks before you sign anything. The formal discipline behind this process is called venue acoustics evaluation and it covers far more than whether the speakers are loud enough. It addresses reverberation, background noise, transmission to neighbouring spaces, and whether the physical room will support the clarity your guests deserve.
Before your next site visit, act on these five steps:
- Run a clap test in the empty room and listen for long, decaying echoes or a sharp slap off hard surfaces.
- Check background noise with the HVAC running at normal setpoints; if you can hear a persistent hiss or hum, flag it immediately.
- Confirm the municipal noise curfew for that address before you negotiate any contract clause.
- Ask the venue coordinator for documentation of prior amplified events and any neighbour complaints on file.
- Decide your go/no-go threshold: pass the venue if background noise sits below the typical NC-35 threshold and no dominant HVAC hiss is present; require written mitigation commitments if background noise is problematic.
That single decision rule — background noise below NC-35, no dominant mechanical hiss, confirmed curfew in the contract — is the fastest way to separate a venue worth booking from one that will cost you in retrofits, complaints, or a premature end to your reception.
Key takeaways
A destination venue can deliver exceptional sound when you test it properly, document what you find, mitigate the problems you can, and lock the rest into the contract before you sign.
| Point | Details |
|---|---|
| Use the NC-35 threshold | Pass the venue if background noise (HVAC running) stays below NC-35; require written mitigation otherwise. |
| Test with impulse and music | A clap test and a music sample reveal timbre, immersion, and echo problems that an SPL reading alone cannot capture. |
| Confirm curfew in writing | Obtain the bylaw reference, the exact permitted time, and a named responsible party for permit costs before signing. |
| Zone speakers for even coverage | Even coverage across dining and dance areas reduces the need for higher overall levels and lowers complaint risk. |
| Engage Dj-phoenix early | A pre-event site assessment and professional soundcheck by Dj-phoenix removes audio risk before guests arrive. |
Table of Contents
- How does venue size, shape, and material affect sound quality?
- What sound tests can you run yourself on a site visit?
- What sound equipment and infrastructure should you verify before signing?
- How do you check Canadian municipal bylaws, permits, and curfews?
- What mitigation options work at destination venues?
- How should you run a sound check for a destination wedding?
- What questions should you ask the venue before you sign?
- When should you hire a professional audio consultant or acoustic pro?
- What mistakes do couples most often make with venue sound?
- Dj-phoenix brings professional sound expertise to your destination wedding
- Reliable acoustics and noise resources for Canadian planners
- Sources
How does venue size, shape, and material affect sound quality?
Sound behaves differently in every room, and understanding why gives you a decisive advantage on a walk-through. The three variables that matter most are volume, geometry, and surface materials.
Volume, ceiling height, and reverberation time
A large, tall room holds more acoustic energy and takes longer to dissipate it. Acousticians measure this as RT60 — the time, in seconds, for a sound to decay by 60 dB after the source stops. For speech clarity at a ceremony, an RT60 below 1.0 second is generally desirable; for music with a DJ dance floor, 0.8–1.2 seconds tends to feel lively without muddying lyrics. A stone-walled château with a 6-metre ceiling and no soft furnishings can push RT60 above 2.5 seconds, which makes speech almost unintelligible at the back of the room.
Clarity is captured by the metric C80 (for music) or C50 (for speech), which compares early-arriving sound energy to late reverberant energy. A positive C80 value means the direct sound dominates, which listeners perceive as clear and detailed. A negative value means the room is swimming in reverb.
What surface materials do to your sound
| Material | Acoustic behaviour | Practical impact |
|---|---|---|
| Polished stone or concrete | Highly reflective across all frequencies | Long RT60, strong flutter echoes, boomy bass |
| Glass (windows, partitions) | Reflective mid/high, transmits low frequencies | Slap echoes, sound leakage to adjacent spaces |
| Hardwood floors | Moderately reflective, some low-frequency resonance | Adds warmth but can amplify bass boom |
| Heavy drapes or upholstered seating | Absorptive mid/high frequencies | Shortens RT60, improves speech clarity |
| Carpet and rugs | Absorptive, especially high frequencies | Reduces flutter echo, tightens bass response |
| Acoustic ceiling tiles | Broadband absorption | Lowers RT60 significantly, improves STI |
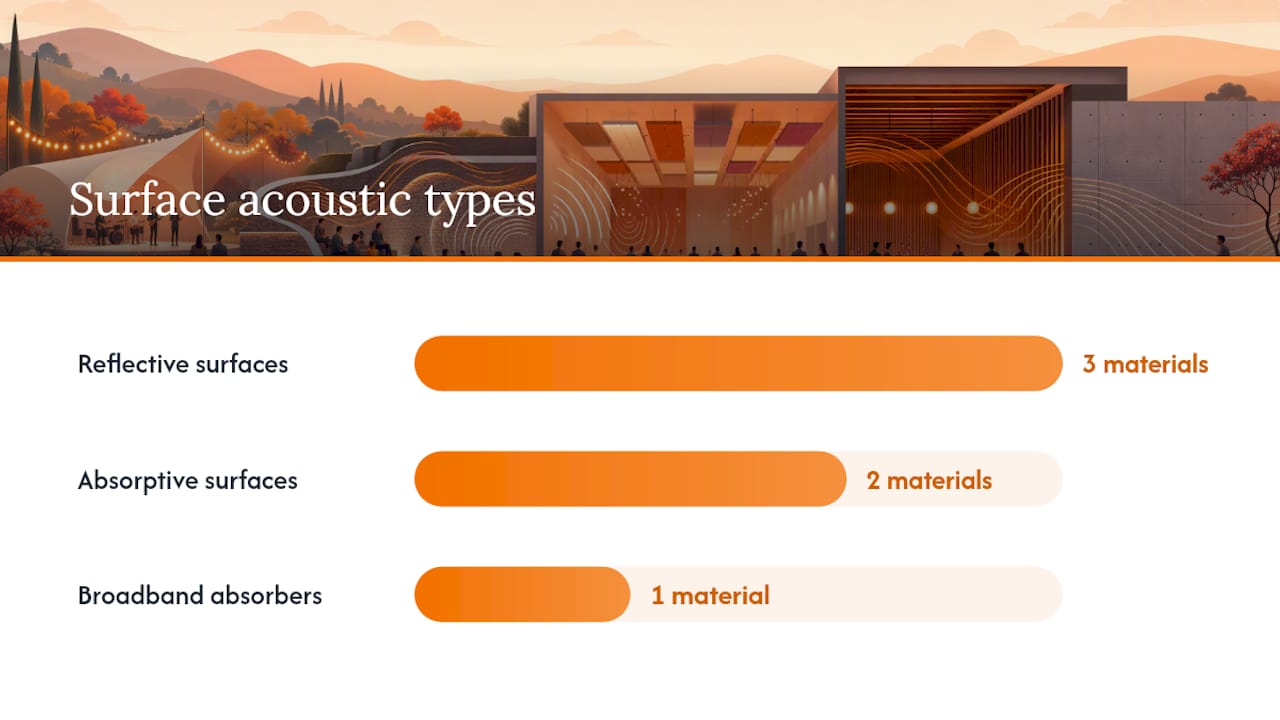
Stone and glass are the most common culprits in destination venues — heritage barns, vineyard halls, and waterfront pavilions frequently combine both. Acoustic planning at the concept stage is far more cost-effective than retrofitting treatments after finishes are fixed, which is worth raising with the venue during early negotiations.
Indoor versus outdoor: a different set of rules
Outdoors, there are no parallel walls to create flutter echoes, but you lose the room gain that helps speakers project. Sound disperses rapidly with distance, and ground reflections can cause comb filtering — a frequency-response colouring that makes certain notes sound hollow. Wind direction matters enormously: a 20 km/h crosswind can shift perceived loudness by several dB across the guest area, and a headwind pushes sound away from the audience entirely.
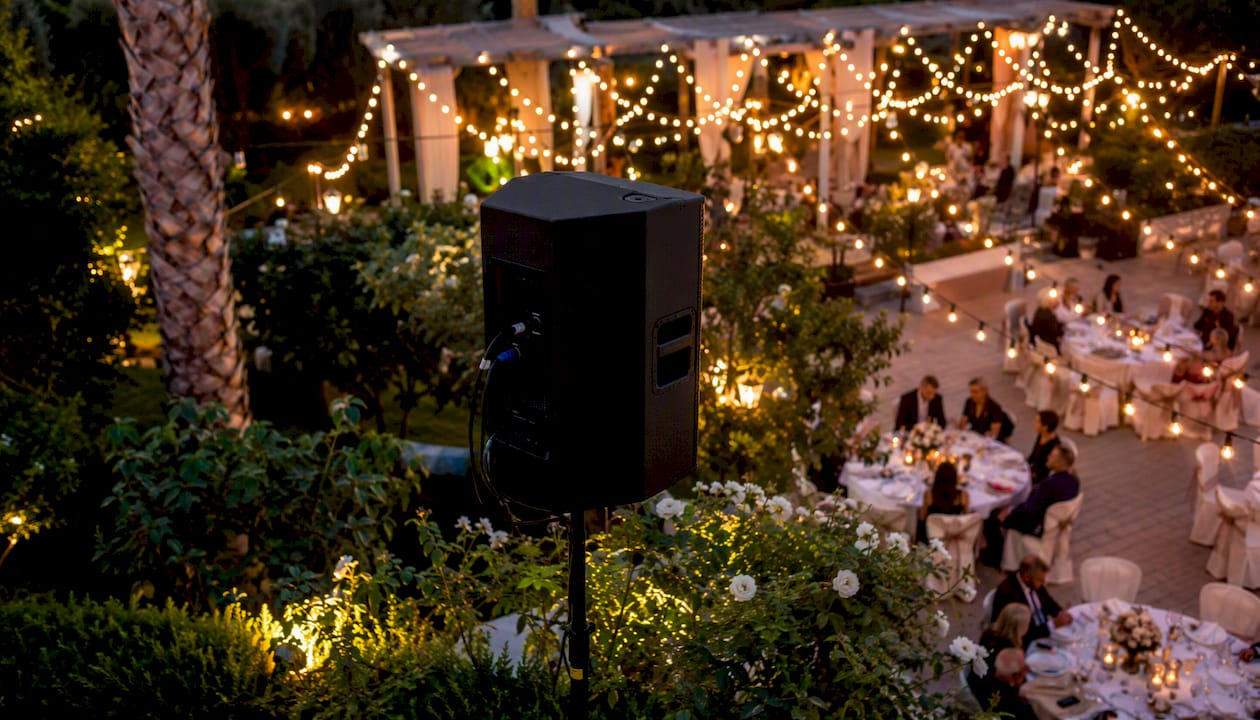
Time of day changes outdoor acoustics more than most couples expect. Cool evening air is denser, which carries low frequencies further and can push bass energy toward neighbouring properties well after the dance floor has warmed up. Morning site visits give you an incomplete picture of how the venue will behave at 9 PM on a Saturday in July.
Mechanical background noise: the hidden problem
HVAC systems, kitchen exhaust fans, pool pumps, and refrigeration compressors all generate continuous background noise. A Toronto venue case study found that return-air grilles pushed ambient levels above NC-35 in several areas of the room, creating a persistent hiss that competed directly with speech. Replacing or silencing those grilles brought levels back into an acceptable range. Always measure background noise with the HVAC running at its normal setpoint, not switched off for the visit.
Practical red flags to note during your walk-through:
- A long, decaying echo after a sharp clap (RT60 likely above 1.5 seconds)
- A distinct slap echo from a hard rear wall
- Low-frequency boom that obscures bass notes (parallel walls or a low ceiling)
- Audible hiss or hum from mechanical systems
- Sound bleeding clearly from an adjacent room or outdoor terrace
Sound quality assessment goes well beyond measuring decibels. Listeners judge a space on timbre (frequency balance and clarity), immersiveness (how the sound field fills the room), and distortion — three dimensions that a single SPL reading cannot capture.
Pro Tip: Bring a small Bluetooth speaker and play a familiar song from the planned DJ position. Walk to the back corners and listen for tonal changes, dropouts, or excessive reverb. Your ears will tell you more than a number on a screen.
What sound tests can you run yourself on a site visit?
A structured walk-through protocol gives you repeatable, comparable observations across multiple venues. None of these tests require professional equipment, though a calibrated sound level meter app adds useful context.
Step-by-step site-test protocol
Arrive with the HVAC on. Ask the venue coordinator to set the system to its normal event setpoint before you begin. This is the baseline you will actually work with on the day.
Stand at the planned DJ or band position and clap once, sharply. Listen for the decay: a clean, fast fade is good; a long, fluttering tail or a distinct slap from the opposite wall signals a problem. Repeat from the guest seating area and from the back corners.
Conduct a talk test. Have a colleague stand at the DJ position and speak at a normal conversational level while you walk to the furthest guest table. If you struggle to follow the words without straining, speech intelligibility is poor. Switch roles and repeat.
Play a recorded music sample from the planned source position using a portable speaker or your phone. Choose a track with a clear vocal, a defined bass line, and some high-frequency content (hi-hats, acoustic guitar). Walk the room and note where the bass becomes boomy, where the vocal loses definition, and where the sound feels thin or hollow. Impulse tests and music samples are the most practical way to reveal how timbre and immersion will behave in the actual space.
Take a smartphone SPL reading at several positions: DJ position, centre of the dance floor, back of the dining area, and near any adjacent room or outdoor boundary. Use an A-weighted (dBA) measurement and note the Leq (equivalent continuous level) rather than the peak, which spikes on transients and is less meaningful for planning.
Listen from the guest tables with the music sample still playing. Note whether the sound feels balanced or whether certain frequencies dominate. Check whether conversation at a normal level is possible during the quieter passages.
Identify environmental intrusions. Step outside briefly and listen for traffic, neighbouring venue music, or construction. Note the wind direction and any nearby noise sources that will be active during your event time.
Using smartphone apps responsibly
Apps like NIOSH SLM (iOS) or DecibelX give useful ballpark readings, but they carry real limitations. Built-in microphones are not calibrated to a measurement standard, so absolute accuracy is limited. A-weighting is generally applied correctly, but low-frequency response below 100 Hz is unreliable on most phones. Use readings as relative comparisons between positions and venues, not as definitive compliance measurements. A professional acoustic consultant with a calibrated Class 1 or Class 2 sound level meter is required for any regulatory or contractual claim.
Recording your observations
Capture the following for each venue in a simple note or spreadsheet:
- Location in the room (DJ position, centre, back-left corner, etc.)
- Time of day and weather conditions (for outdoor tests)
- HVAC status (on/off, setpoint)
- Clap test result (clean decay / flutter / slap echo)
- Talk test result (clear / strained / unintelligible)
- Music sample notes (bass boom, vocal clarity, tonal balance)
- Smartphone dBA reading (Leq at each position)
- Any mechanical noise sources identified
Flag any position where the talk test fails or where the smartphone reading shows background noise above 45 dBA with the HVAC running. Those flags are the starting points for a professional follow-up assessment.
What sound equipment and infrastructure should you verify before signing?
Confirming the venue’s technical infrastructure before you commit prevents expensive surprises on event day. The type of venue and its intended use directly shapes what PA configuration will work and what the venue is likely to have on hand.
PA types and coverage
Different event formats demand different speaker configurations:
- Background dining and ceremony: A distributed system of smaller speakers placed closer to guests at lower levels delivers even coverage without the volume required to push sound across a large room. This approach, recommended by practitioners, means even coverage reduces perceived loudness while improving intelligibility and reducing neighbour complaints.
- DJ dance floor: A main PA with subwoofers handles the dynamic range of dance music. Speaker placement should direct energy toward the dance floor and away from adjacent dining areas or outdoor boundaries.
- Ceremony with live officiant: A single cardioid vocal microphone through a small PA or column speaker is usually sufficient; the priority is speech intelligibility, not volume.
Ask the venue whether their included system has been professionally tuned and whether a coverage map or system documentation is available. A system that has never been measured may have significant dead zones or hot spots.
Power and distribution
- Confirm the availability of dedicated 20-amp circuits for the DJ or band position, separate from catering and lighting loads.
- Ask whether a generator is available or permitted on site for outdoor events.
- Check that the panel is accessible and that the venue’s electrician or technical contact will be present during load-in.
- For large outdoor setups, verify cable run distances from the power source to the stage; long runs on undersized cable cause voltage drop that affects amplifier performance.
Connectivity and cabling
- Confirm whether the venue supplies XLR stage feeds, DI boxes, mic stands, and speaker mounts, or whether these must be brought in.
- For outdoor events, check that cable runs can be protected from foot traffic and weather (cable ramps, waterproof connectors).
- Ask about Wi-Fi or cellular signal at the DJ position if digital music sources or streaming backup is part of the plan.
Load-in logistics
- Verify staircase and elevator dimensions for large speaker cabinets and subwoofers.
- Confirm load-in timing and whether the venue allows access the day before for a full setup and soundcheck.
- For outdoor PA, ask about weather protection: a sudden afternoon storm can damage unprotected equipment and delay the event.
Redundancy checklist:
- Spare wireless microphone (body pack and handheld)
- Backup music source (USB drive or phone with full playlist downloaded offline)
- Spare speaker cable and DI box
- Quick-placement monitor speaker for the DJ position if the main PA has coverage gaps
Pro Tip: Ask the venue for the make and model of their included PA system before the site visit, then look up its coverage angle and SPL rating. A system rated for 500 people in a manufacturer’s spec sheet may be entirely inadequate in a reverberant stone hall of the same capacity.
For guidance on PA sizing for high-energy formats, the outdoor PA selection guide covers coverage, power, and weather considerations in detail.
How do you check Canadian municipal bylaws, permits, and curfews?
Sound regulations for outdoor and amplified events in Canada are set at the municipal level, which means the rules for a vineyard in Niagara-on-the-Lake differ from those for a waterfront property in Vancouver or a heritage estate outside Montréal. There is no single national standard for event noise curfews.
Where to find the rules
- Search your municipality’s website for terms such as “noise bylaw,” “special events permit,” “amplified sound permit,” and “outdoor events.”
- Most major Canadian municipalities publish their noise bylaws in full online. Look for the section covering “amplified music,” “sound-emitting devices,” or “special events exemptions.”
- If the venue is in a provincial or national park, the governing authority is the provincial parks service or Parks Canada, not the local municipality.
Typical permit timelines
Municipal special events permits in Canada generally require applications 30–90 days in advance, depending on the municipality and the scale of the event. Larger cities such as Toronto, Vancouver, and Calgary have dedicated special events offices that process applications and may require a noise management plan as part of the submission. Smaller municipalities may route applications through the local bylaw enforcement office or the police non-emergency line.
Pro Tip: Call the bylaw enforcement office directly rather than relying solely on the venue’s assurances. Ask whether the specific address has received noise complaints in the past two years and whether any prior event permits were issued with conditions. This takes ten minutes and can save you from booking a venue with a documented complaint history.
Common noise limits and how to capture them in a contract
Most Canadian municipal noise bylaws express limits in dBA at the property line, with time-of-night cutoffs. Common patterns include:
- Amplified music permitted until 11 PM on weekdays and midnight on weekends, with a 10 dBA reduction after 10 PM in some jurisdictions.
- Outdoor amplified events requiring a permit above a certain guest count (often 150–200 persons).
- Specific dBA limits at the nearest residential property line (commonly 55–65 dBA during permitted hours).
Capture these in your contract with the venue using language such as: “The venue confirms that amplified music is permitted until [time] under [bylaw reference], that a special events permit has been or will be obtained by [date], and that any fines arising from non-compliance with the permit conditions are the venue’s responsibility.”
Ask the venue to provide a copy of any prior event permits and to confirm in writing who is responsible for applying for the permit for your event.
What mitigation options work at destination venues?
Acoustic mitigation at a destination venue does not have to mean visible foam panels and industrial-looking baffles. The most effective approaches are either invisible to guests or actually enhance the room’s aesthetic.
Quick temporary fixes
These can be arranged in the weeks before the event or on the day of load-in:
- Heavy drapes or velvet curtains hung behind the stage and along reflective rear walls absorb mid and high frequencies, shortening RT60 without permanent installation.
- Rugs and carpet runners on hardwood or stone floors reduce flutter echo and tighten bass response in the dance area.
- Acoustic banners (fabric panels on lightweight frames) can be positioned behind the DJ or along side walls; many suppliers offer neutral colours that blend with décor.
- Portable bass traps placed in room corners address low-frequency buildup, which is the hardest problem to fix with speaker placement alone.
Operational controls
Speaker direction and level management are often more effective than physical treatment for destination venues where permanent installation is not possible:
- Direct subwoofers away from the nearest residential boundary and toward the centre of the dance floor.
- Use speaker zoning to keep dining areas at a lower level than the dance floor; a separate zone for the ceremony space prevents bleed during speeches.
- Set a firm level cap agreed with the venue coordinator and document it before the event begins.
- Schedule quiet periods: dinner service and speeches at lower levels, with the dance floor programme beginning after a defined time.
Even coverage through zoning consistently reduces the need for higher overall levels, which in turn reduces the risk of bylaw complaints and curfew enforcement.
Structural requests during planning
If you have access to the venue during the planning period, these longer-term treatments are worth requesting:
- Absorptive ceiling panels or suspended baffles (often available in decorative finishes)
- Door seals on the boundary between the event space and adjacent rooms or corridors
- HVAC silencers or duct lining on return-air grilles, which the Toronto case study identified as a primary cause of elevated background noise
Layout and programming adjustments
Moving the dance floor away from the wall shared with a neighbouring venue or a residential boundary is often the single most effective mitigation available. Relocating food stations away from the speaker line reduces the ambient noise level in the dining area without any acoustic treatment at all. Staggering amplified sets with acoustic or ambient interludes gives the room time to recover and reduces cumulative sound exposure for guests near the speakers.
Recommended target levels for destination weddings:
These targets are practical planning thresholds, not regulatory standards. Confirm the applicable bylaw limits for your specific venue address before using them in a contract.
How should you run a sound check for a destination wedding?
A well-run sound check at a destination venue typically requires two to three hours and should happen the day before the event or at minimum four hours before guests arrive. Rushing this process is one of the most common and costly mistakes in destination wedding planning.
Suggested pre-event timeline
Arrival and load-in (T minus 3 hours). DJ and technical crew arrive, unload, and begin rigging speakers and running cable. Venue coordinator confirms power circuits and load-in access.
Line check (T minus 2.5 hours). Verify every input and output: DJ mixer to main PA, wireless microphones, monitor feeds, and any ceremony speaker feeds. Confirm that all channels are clean and free of hum or interference.
Volume calibration (T minus 2 hours). Play a reference track at the planned dance-floor level and walk the room. Adjust speaker angles and EQ to achieve even coverage across the dance floor and a lower level in the dining zone. Document the final gain settings on the mixer.
Speech intelligibility check (T minus 1.5 hours). Hand the officiant’s or emcee’s microphone to a colleague and have them read a passage of text from the ceremony or speech position. Walk to the back of the room and confirm clarity. Adjust EQ if the voice sounds thin or boomy.
Music walk-through (T minus 1 hour). Play a representative sample of the planned programme: a slow ceremony track, a dinner background piece, and a dance-floor opener. Walk from the DJ position to the back corners and note any coverage gaps or tonal imbalances. A 2D coverage map produced during a professional assessment would have identified these zones in advance; during the soundcheck, use your ears and a smartphone SPL app to flag them.
HVAC and background noise check (T minus 45 minutes). Turn off the music and listen. With the HVAC running at its event setpoint, confirm that background noise is below your agreed threshold. If it is not, this is the last opportunity to request a silencer adjustment or to reposition speakers to compensate.
Final level confirmation and sign-off (T minus 30 minutes). Confirm agreed operating levels with the venue coordinator. Both parties note the maximum permitted dBA and the curfew time. The DJ documents final mixer settings with a photo.
Roles and responsibilities
- DJ or audio technician: owns calibration, EQ, and level management throughout the event.
- Venue coordinator: enforces the agreed curfew and communicates any complaints from neighbours or adjacent event spaces.
- Planner or couple’s representative: confirms that the sound check results match the couple’s expectations before guests arrive.
Sound check checklist:
- All wireless microphones tested and frequencies confirmed clear
- Main PA gain structure set and documented
- Speech intelligibility confirmed from the back of the room
- Dance floor level confirmed at agreed maximum
- Dining zone level confirmed at a lower setting
- HVAC background noise confirmed below NC-35
- Curfew time confirmed with venue coordinator
- Emergency backup source (USB/phone) tested and ready
A pre-event DJ consultation is the right moment to align on all of these technical requirements before the day itself, so the sound check is a confirmation rather than a discovery session.
What questions should you ask the venue before you sign?
Arriving at a venue walk-through with a prepared question list separates planners who get what they need from those who discover problems after the deposit is paid. The questions below are grouped by priority.
Questions to ask on site
- What PA system is included, and has it been professionally tuned and documented?
- What is the maximum permitted sound level at the property line under the applicable noise bylaw?
- What time does amplified music need to stop, and is that a bylaw requirement or a venue policy?
- Has the venue received any noise complaints from neighbours in the past two years?
- Who is responsible for obtaining the special events permit, and what is the timeline?
- Are dedicated power circuits available for the DJ or band, separate from catering and lighting?
- What is the load-in access and timing, and is the day before available for setup?
- Is there an on-site technical contact during the event, or does the DJ manage all audio independently?
Contract items to confirm
- Curfew clause: state the exact time amplified music must cease, the bylaw reference, and who bears responsibility for any fines if the curfew is breached.
- Sound level limit: specify the maximum permitted dBA at the property line and at the dance floor edge, and confirm who monitors compliance.
- Permit responsibility: name the party responsible for obtaining and paying for the special events permit.
- Included equipment list: attach a schedule of all venue-supplied audio equipment, including make, model, and condition.
- Penalty and remedy clause: specify what happens if the venue cannot meet the agreed sound conditions (e.g., HVAC noise above NC-35 on event day) — a partial refund, a mitigation obligation, or the right to bring in additional equipment at the venue’s cost.
How to record answers during the visit
Bring a printed or digital copy of this question list and note the name of the person answering each question. Follow up with a written summary email to the venue within 24 hours, confirming the answers you received. That email creates a record that is far easier to rely on than memory if a dispute arises later.
For a broader picture of what venue terminology and operational details mean in practice, a planner’s reference guide can help you decode the language venues use in their contracts.
When should you hire a professional audio consultant or acoustic pro?
DIY site tests are valuable for initial screening, but several scenarios call for a professional with calibrated equipment and formal measurement training.
Clear signals you need a pro
- The venue has complex geometry: curved walls, balconies, a mezzanine, or a low ceiling over part of the room.
- The site is a heritage building where permanent treatment is restricted and you need to know exactly what temporary measures will achieve.
- Your DJ or band will be loud and the nearest residential property is within 50 metres.
- Your site tests revealed inconsistent coverage, a dominant low-frequency boom, or background noise above NC-35 that the venue has not addressed.
- The event involves multiple simultaneous spaces (ceremony, cocktail, reception) with potential sound bleed between them.
What a professional will deliver
A qualified acoustic consultant or audio engineer working at the professional level will typically provide:
- RT60 and clarity measurements (T30, C80, C50, STI) taken with a calibrated measurement system such as a dodecahedron loudspeaker and a Class 1 sound level meter.
- A 2D coverage map that reveals interference patterns, comb filtering, and zones of over- or under-coverage that a single-point SPL check will miss entirely. This is the standard practitioners recommend for ensuring even coverage across dining and dance areas.
- Background noise assessment with the HVAC and all mechanical systems running, expressed as NC curves and dBA Leq values.
- ASTC/STC advice on partition performance between the event space and adjacent rooms or outdoor boundaries.
- A mitigation specification that lists recommended treatments, their expected effect, and their cost range.
- Commissioning support on event day to verify that the agreed setup performs as specified.
For venues where the MDAQS framework is applied, a consultant can predict perceived audio quality across the three dimensions that matter to listeners: timbre, immersiveness, and distortion. This goes well beyond what a smartphone app can tell you.
Cost factors and timelines
Travel to a destination site adds cost; budget for a half-day or full-day site visit plus a follow-up report. Measurement and modelling time varies with room complexity. A straightforward single-room assessment with a written report typically takes one to two weeks from site visit to delivery. For complex multi-room venues or heritage sites, allow three to four weeks.
Questions to ask a prospective consultant
- What measurement standard do you work to (ISO 3382, ANSI S12.2)?
- What deliverables are included (raw data, RT60 plots, coverage maps, written report)?
- Have you worked on destination wedding venues or similar hospitality spaces in Canada?
- Can you be present on event day for commissioning and level verification?
Open-source tools such as SQAT allow professionals to calculate psychoacoustic metrics from calibrated recordings, adding a quantitative layer to the assessment that goes beyond standard room acoustics measurements.
What mistakes do couples most often make with venue sound?
There is a gap between what couples assume about venue sound and what actually determines whether a reception feels magnificent or frustrating. Having worked across a wide range of destination venues, a few patterns repeat with striking consistency.
The most common error is trusting the venue’s included PA system without verifying it. A system that worked adequately for a 100-person cocktail reception will not deliver the dynamic range or coverage a DJ dance floor requires. Venue coordinators are not audio engineers, and their confidence in the system is not a substitute for a line check and a walk-through.
Ignoring HVAC hiss is the second most frequent oversight. Couples visit venues during the day with the system off or at a low setting, hear a quiet room, and assume the background noise will stay that way. By the time the kitchen is running at full capacity and the HVAC is cooling a room full of guests, the ambient level can be 10–15 dB higher than what they heard on the tour.
Booking without a walk-through at the planned event time is a related problem. A vineyard terrace that feels intimate and quiet at 2 PM on a Tuesday can be flanked by a neighbouring winery’s amplified event by 8 PM on a Saturday. The only way to know is to visit at the right time.
Quick fixes that work on short notice:
- Reposition the DJ stage away from the hard rear wall to reduce bass buildup and slap echo.
- Lower the EQ at 250 Hz and 500 Hz to reduce the muddy mid-bass that reverberant rooms amplify.
- Add a temporary drape or banner behind the DJ position; even a single 2-metre panel makes a measurable difference in a reflective space.
- Zone the dining speakers to a lower level than the dance floor, so guests can hold a conversation without the DJ competing with them.
The deeper principle is that sound quality at a destination wedding is not just about volume. Listeners judge a space on timbre, immersiveness, and distortion — three dimensions that require deliberate planning, not just a loud PA. The couple who invests in a proper acoustic assessment and a professional DJ with the right equipment will remember the evening as one where the music felt right, not just audible.
Dj-phoenix brings professional sound expertise to your destination wedding
When the venue is extraordinary and the stakes are high, the sound system cannot be an afterthought. Dj-phoenix brings a calibre of audio expertise to destination weddings that goes well beyond pressing play: pre-event site assessment, professional PA rental, on-site commissioning, sound check management, and curfew compliance are all part of the service. Every event begins with a consultation that addresses the specific acoustic conditions of your venue, the programme format, and the municipal noise requirements for that address.
What sets Dj-phoenix apart is the pedigree of experience across a diverse range of prestigious venues and multicultural celebrations, including destination weddings where the acoustic environment demands both artistry and technical precision. From the ceremony microphone to the final dance-floor set, every element is calibrated to the room, the programme, and the couple’s vision. You can review past event setups and staging to see how discreet, high-quality speaker integration looks in practice across a range of venue types.
To confirm availability for your destination wedding date and to arrange a pre-event consultation, visit DJ Phoenix Entertainment and connect with the team directly.
Reliable acoustics and noise resources for Canadian planners
A short list of authoritative starting points for permits, measurement standards, and professional guidance:
- Your municipal website: Search “[city name] noise bylaw” and “[city name] special events permit” for the applicable rules and application forms. Toronto, Vancouver, Calgary, Ottawa, and Montréal each publish their bylaws in full online.
- National Research Council Canada (NRC): The NRC’s construction division publishes guidance on sound transmission class (STC) and room acoustics standards relevant to venue assessment.
- Sound quality metrics (University of Salford): An academic overview of the metrics used to assess perceived sound quality, including the rationale for impulse tests and music samples over SPL alone.
- Psychoacoustic algorithms (NI): Technical reference for ISO 532B loudness, roughness, sharpness, and tonality metrics that explain why measured decibels do not fully predict what listeners perceive.
- SQAT on GitHub: Open-source toolbox for calculating psychoacoustic metrics from calibrated recordings; useful for audio professionals conducting quantitative venue assessments.
- Sounditarium soundfield check: Practitioner guidance on 2D coverage mapping to identify interference patterns and coverage gaps that single-point measurements miss.
- Toronto venue acoustics case study (MDPI): Field measurements from a real Canadian venue conversion, with specific findings on HVAC noise paths and the effect of silencers and door STC on background levels.
- Canadian Association of Professional Speakers and the Audio Engineering Society (AES) Canada Section: Both maintain directories of qualified audio professionals who work in the Canadian market and can provide referrals to acoustic consultants with hospitality venue experience.
Sources
- Sound quality metrics | Acoustics Innovation Institute | University of Salford
- MDAQS – Instrumental evaluation of audio quality
- Restaurant Sound System Design London | Sonic Design Studios
- Acoustics of a Music Venue/Bar—A Case Study
- Soundfield check — Sounditarium