Most wireless mic dropouts trace back to four culprits: RF interference, a faulty antenna or cable, a frequency conflict, or a battery that’s given up its charge. The first move when a mic cuts out mid-show is to isolate that channel and glance at the receiver’s RF and pilot-tone indicators. That single check tells you whether you’re chasing a radio problem or a hardware one, and it stops you from tearing apart the wrong piece of gear while a room full of guests waits.
TL;DR:
- Ensuring unobstructed line-of-sight antenna placement and avoiding reflective surfaces can significantly reduce mic dropouts caused by multipath interference.
- Regularly swapping components like transmitters, cables, and antennas, and testing them directly at the performance location, helps identify faults early and prevents unnecessary gear replacements.
- Using a spectrum analyser and pre-event RF scans to select clean channels before the event minimizes interference from Wi-Fi, Bluetooth, DTV, and LED lighting in the environment.
- Keeping backup gear, such as spare transmitters, receivers, batteries, and a runbook with pre-cleared frequencies, ensures quick recovery from dropouts during live shows.
- An experienced professional operator who performs location-specific tests and builds a routine workflow can prevent most dropouts and save valuable time during critical moments.
Table of Contents
- Diagnosing wireless mic dropouts during sound check or a live show
- How to tell RF dropouts from audio-path problems
- Why wireless mics really drop out: multipath, interference, and worn gear
- Antenna placement and distribution rules that actually prevent dropouts
- Frequency coordination tools and walk tests before doors open
- Backup gear and a simple runbook for show-day peace of mind
- What years of live events teach you about wireless reliability
- The troubleshooting habit most techs skip, and it costs them
- How a professional operator keeps your mics from ever cutting out
- Where to keep learning about RF and mic reliability
- Sources
- FAQ
Diagnosing wireless mic dropouts during sound check or a live show
When a channel drops, resist the urge to touch everything at once. A structured process of elimination gets you to the answer faster than guesswork, and it’s the same method Shure recommends for isolating wireless dropouts under pressure.
- Isolate the failing channel. Mute or power down every other wireless system in the room so you’re not chasing a ghost caused by a second transmitter.
- Watch the receiver’s RF meter and pilot-tone light while someone reproduces the dropout by walking the room or talking near the failure point.
- Swap the transmitter, mic capsule, or cable for a known-good spare. If the dropout follows the swap, you’ve found an audio-path fault, not an RF one.
- Scan for a cleaner frequency and retune if the receiver shows RF activity but nothing usable on the assigned channel.
- Bypass any antenna distribution system and connect the receiver directly to its own antennas to rule out a failing splitter or combiner.
- Walk test the actual performance zones, not just the FOH rack, since coverage holes rarely show up standing next to the receiver.
Pro Tip: Keep a laminated card in your kit with your venue’s known dead zones and backup frequencies. Five seconds of reading beats five minutes of re-scanning during a live toast.
How to tell RF dropouts from audio-path problems
Reading the receiver correctly saves you from replacing parts that were never broken. Lectrosonics documents pilot-tone behaviour as one of the clearest tells: if the pilot tone drops out alongside the audio, the receiver is muting on purpose because it’s lost confidence in the RF link.
- If the RF meter dips or flatlines exactly when the audio cuts, the problem is almost certainly RF.
- If the RF meter stays strong but audio still disappears or distorts, look at the audio path: a bad XLR, a loose capsule connection, or a corroded battery contact.
- Bypassing the squelch or pilot-tone circuit temporarily (where the receiver allows it) exposes whether a weak-but-usable signal is being muted unnecessarily.
- Swap the mic element first, then the transmitter body, then the receiver module, one at a time, to isolate exactly which component is failing.
- Check for firmware quirks: some digital receivers misreport RF strength after a sleep cycle, mimicking a dropout that isn’t really there.
Why wireless mics really drop out: multipath, interference, and worn gear
Multipath is the quiet troublemaker behind a huge share of “unexplainable” dropouts. When a transmitted signal bounces off a wall, truss, or LED wall and arrives at the antenna slightly out of phase with the direct signal, the two waves cancel each other out. RF Venue’s technical breakdown explains why moving a performer or antenna by only a few feet can restore full signal: it shifts the phase relationship just enough to stop the cancellation.
Beyond multipath, several environmental sources compete for the same spectrum:
- Wi-Fi routers and access points, especially in hotel ballrooms with dense coverage
- Bluetooth devices carried by guests and staff
- Digital TV broadcast channels and public-safety radio allocations near your operating band
- LED lighting fixtures and dimmer packs, which throw off electromagnetic noise that can sit right on top of your mic frequencies
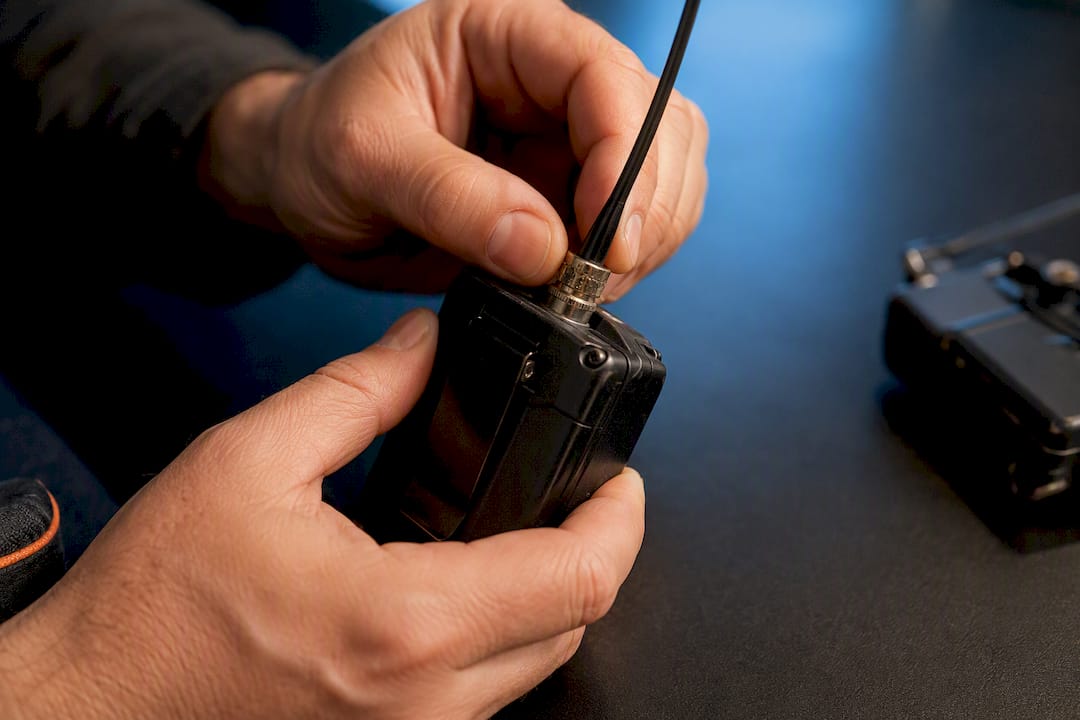
Hardware failure deserves equal suspicion. A cracked antenna, a corroded BNC connector, or a coax run pinched under a road case will produce symptoms nearly identical to RF interference. Battery voltage sag is another sneaky one: a transmitter running on a tired battery often reduces its own output power to conserve what’s left, shrinking your usable range without any warning light. Analogue systems carry one more quirk worth knowing: DPA Microphones notes that ultrasonic transducers in the 32 to 48 kHz range can trigger limiter behaviour on some analogue circuits, a fault digital systems generally don’t share.
Antenna placement and distribution rules that actually prevent dropouts
Good antenna placement solves more dropouts than any software fix ever will. A few field-tested rules go a long way:
- Mount antennas with a clear, unobstructed line of sight to wherever performers will actually stand.
- Space diversity antennas several feet apart, and keep both well away from large metal surfaces like staging trusses or catering equipment, which reflect and distort RF.
- Inspect every BNC connector, coax run, and combiner in the chain before blaming the transmitter.
- Replace any cable that looks kinked, taped, or older than the gear it’s connecting.
- Bypass your antenna distribution system entirely and run a receiver on its own antennas as a fast test. If the dropout disappears, the distribution chain is the fault, not the mic.
Pro Tip: A “works over here, fails over there” pattern almost always points to antenna or distribution trouble rather than a bad transmitter, so trace the RF chain from rack to remote antenna before swapping any mic hardware.
Frequency coordination tools and walk tests before doors open
A spectrum analyser earns its cost back the first time it saves you from a mid-ceremony dropout. Running one before load-in shows you the noise floor and which channels are already occupied in that venue, on that day, which changes constantly depending on nearby broadcast trucks or other events in the building.
RF Venue’s coordination guidance recommends pairing that scan with frequency coordination software to avoid intermodulation between your own channels and to avoid active DTV allocations. Once frequencies are set:
- Run a walk test that replicates exactly how performers will move: down the aisle, across the stage, into the crowd.
- Load the system the way it will run live, with lighting, video walls, and other wireless gear powered up.
- Keep an eye on receiver meters throughout the actual event, not just during setup, since venue RF conditions shift as more devices join the network.
Backup gear and a simple runbook for show-day peace of mind
A dropout only becomes a disaster when there’s no backup ready. A lean redundancy kit covers most emergencies:
- Carry at least one spare lavalier or headset element and a spare transmitter body.
- Keep a spare receiver cable and a couple of extra AA or rechargeable batteries, charged and labelled.
- Pack a handheld mic as an immediate fallback if a bodypack system fails outright.
- Write down two or three pre-cleared alternate frequencies before the event, not during it.
- Assign one clear point person, whether that’s the A1 or a trusted stagehand, whose only job is watching meters and executing swaps.
A short printed runbook covering these five points takes two minutes to read and saves far longer when a groom’s lavalier goes quiet mid-vow. Our own wireless mic setup checklist walks through building one for recurring event types.
What years of live events teach you about wireless reliability
Rack-side testing lies to you. A receiver can show a full-strength signal at front-of-house and still lose the plot the second the officiant steps three feet stage left, behind a metal arbour or a video wall. Testing in the exact spot the talent will occupy catches problems no amount of bench testing ever reveals.
Before any ceremony or corporate keynote, we walk every position the talent will use, mic live, meters watched. Antenna damage from a beltpack that’s been clipped on and off hundreds of times is common enough that a spare beltpack rides in every kit as standard insurance. For organisers building their own pre-show checklist, our ceremony sound checklist and acoustic feedback diagnosis guide cover the operational side in more depth.
The troubleshooting habit most techs skip, and it costs them
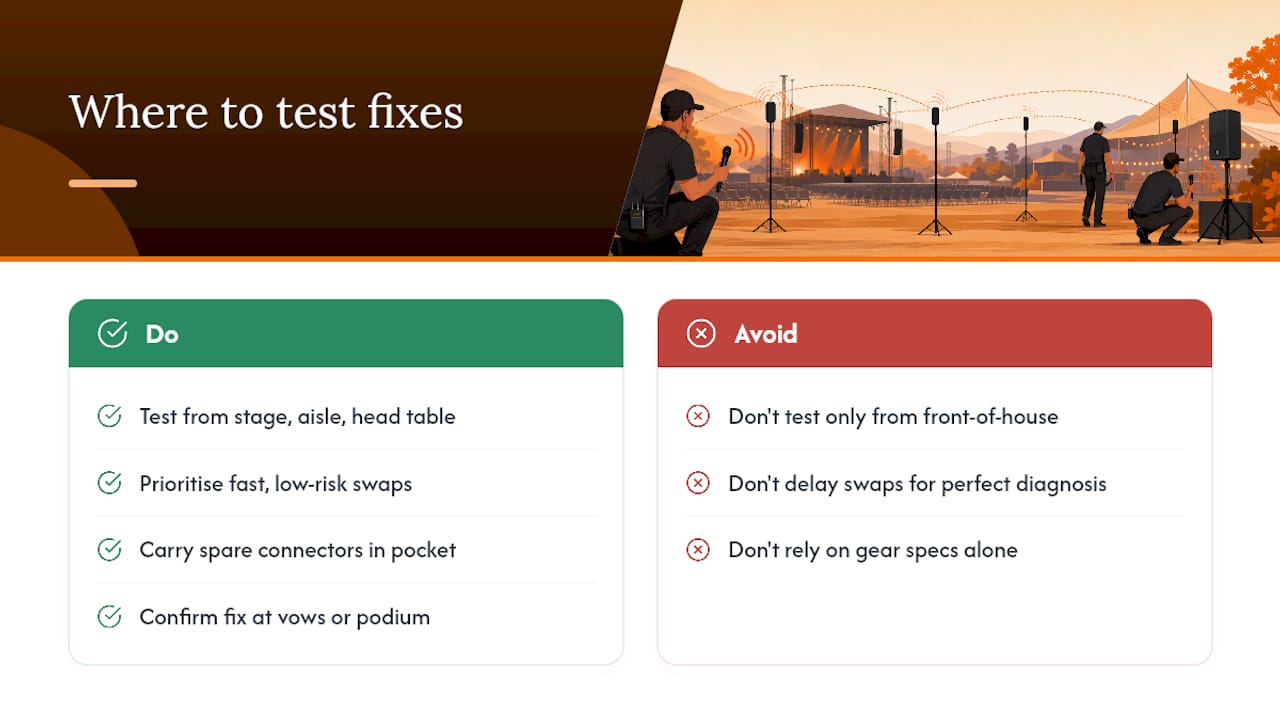
The biggest gap between the standard advice on wireless mic dropouts and what actually prevents them isn’t the equipment. It’s discipline about where you test. Plenty of technically sound advice gets undermined by one lazy habit: confirming a fix from the rack instead of from the stage, the aisle, or the head table. A signal that looks perfect at front-of-house can vanish the instant a performer turns their body, and that gap between “tested” and “tested where it matters” is where most show-day surprises live.
Conventional troubleshooting guides also tend to over-index on gear specs and under-index on speed. In a live event, the correct diagnosis matters less than how fast you can execute a swap once you’ve made it. A tech who can identify a dead antenna in ninety seconds and already has a spare connector in a pocket beats one who owns a better spectrum analyser but hesitates. Prioritise a fast, low-risk swap procedure over a perfect root-cause analysis. Confirm the fix works exactly where the couple says their vows or the CEO steps up to the podium, then move on.
— Reza
How a professional operator keeps your mics from ever cutting out
Renting gear and reading a manual gets most people through a backyard party. It doesn’t replace someone who’s already scanned a hundred different venues and knows within minutes which frequencies a hotel ballroom or outdoor tent will fight you on. A professional operator builds pre-show RF scans, frequency coordination, and a full spare-kit swap procedure into every booking, so a dropout during your vows or your keynote never becomes the story of the night.

That coverage runs through the Gold, Silver, and Bronze wedding packages, all of which include professional sound system rental and on-site technical support, not just a DJ with a laptop. Corporate organisers get the same reliability through DJ services for corporate events, where a dead lapel mic mid-presentation carries real reputational risk. If your event is smaller in scale but still needs dependable audio, the party packages bundle sound support with add-ons like an MC or drum player. Check available dates and get a quote on the wedding packages page before you lock in your venue.
Where to keep learning about RF and mic reliability
For readers who want to go deeper on the mechanics, Shure’s ten-step troubleshooting guide and Lectrosonics’ nine ways to prevent RF drop-outs are both worth bookmarking. If you’re evaluating recording gear to build a more resilient backup kit, Twisby Records’ gear recommendations offer an honest, non-sponsored starting point, and for outdoor events specifically, this logistics guide covers RF planning around tents and open-air staging.
Sources
- Troubleshooting wireless dropouts in 10 simple steps – Shure
- The anatomy of wireless microphone signal drop-outs – RF Venue
FAQ
Why does a wireless mic keep cutting out?
Most repeat dropouts trace back to RF interference, a damaged antenna or cable, a frequency conflict with another device, or a battery losing voltage under load. Isolating the channel and checking the receiver’s RF and pilot-tone meters usually reveals which one you’re dealing with.
What is the 3:1 rule for mics?
The 3:1 rule is a gain-staging guideline stating that a second microphone should sit at least three times farther from the source than the first mic to avoid phase cancellation and comb filtering. It applies to microphone placement generally and isn’t specific to wireless dropout troubleshooting, though poor spacing can worsen audible artifacts during a partial signal loss.
What are common problems with wireless mics?
The most common issues are RF interference from Wi-Fi, Bluetooth, and DTV signals, multipath cancellation from reflective surfaces, worn or bent antennas, corroded cable connectors, and battery sag reducing transmitter range. Digital and analogue systems both suffer these, though they respond differently to certain interference types.
How do I fix my microphone from cutting out?
Isolate the affected channel, check the RF meter and pilot-tone indicator while reproducing the dropout, then swap in a known-good transmitter, cable, or antenna one component at a time until the fault disappears. If the RF chain checks out clean, bypass any antenna distribution system and retest with a direct antenna connection.
Does hiring a professional reduce the risk of mic dropouts at my event?
Yes. An experienced operator runs pre-show RF scans, carries spare transmitters and receivers, and tests directly in the performance zone rather than at the rack, which catches most coverage problems before guests ever notice. Dj-phoenix builds this workflow into its wedding and corporate event packages as standard practice.